In lieu of a Re-Watch post today, I present you with a guide for how to make your own non-copyright-infringing version of a tribble.
The Basics:
The tribble is essentially a furry softball. It is made using two figure-8-shaped pieces of cloth, sewn together perpendicularly. It is the simplest way to sew a ball—unlike the much more complicated hacky-sack method, it only requires two pieces of cloth.
This does not require a sewing machine or really much sewing skill at all. Anyone can try it!
You Will Need:
-
A flat section of cardboard
-
A jar, lid, or other small circular object
-
Needle and thread
-
Scissors
-
Polyester stuffing
-
Tribble-like fur: I suggest long-haired faux fur, in camel, white, gray, or some combination thereof. Not all fabric stores carry this stuff (probably because it’s tacky) so call ahead!
Stage One: Creating the Pattern
The first thing you need to do is make a pattern. First, determine how big you want your tribble to be. I think smaller is cuter, so I chose to make it slightly bigger than a softball, or about 2 ½ inches in diameter. Remember, the long fur will make it look bigger than the pattern. I adapted from this baseball pattern.
You can click on any image to see a big version.
|
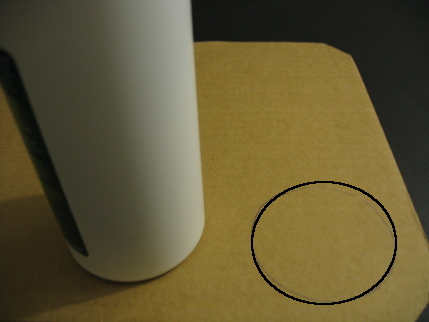
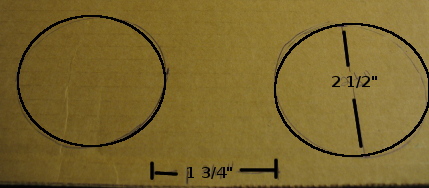
1. Choose a circle to trace. I used a contact solution bottle, but anything about 2″-5″ in diameter will work. Trace that circle on a thin but sturdy piece of cardboard. |
|
|
2. Trace a second circle so that the gap between the inner edges of the two circles is about ⅔ the diameter of the circle. In my case, with a 2 ½” diameter circle, the gap is about 1 ¾ inches wide. |
|
|
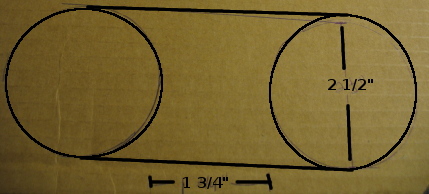
3. Draw lines from the top of one circle to the top of the other, and from the bottom of one circle to the bottom of the other (they should be parallel). |
|
|
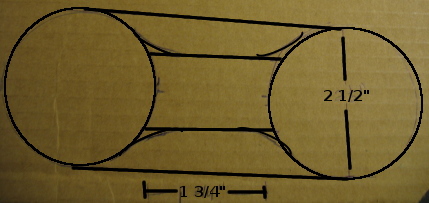
4. Draw two lines parallel to the ones you just drew. The first line should be placed ¼ the total width from the top, while the second should be placed ¼ the total width from the bottom. |
|
|
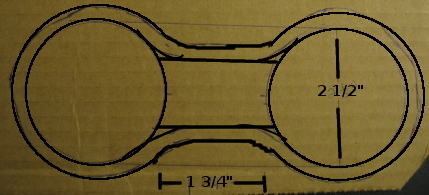
The easiest way to do this is to draw a middle line from the center of one circle to the center of the other, and then split the difference between that middle line and the top line and bottom line. Now erase or ignore the top-top and bottom-bottom lines. Curve the edges of the middle corridor to create a figure-8 shape. |
|
|
5. Measure 1/4 inch around the entire figure-8 shape and draw that line. It’s your seam allowance. Now cut this piece out from the cardboard. |
|
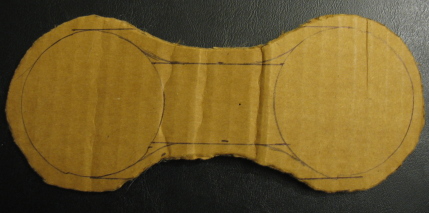
Ta-da! You have a pattern. I strongly recommend taking an old T-shirt, cutting out two pieces, and testing it out on that first. If it comes out oblong, you’ve made your circles too far apart, and if it doesn’t quite stitch up, your circles are too close.
Stage Two: Cutting the Cloth
|
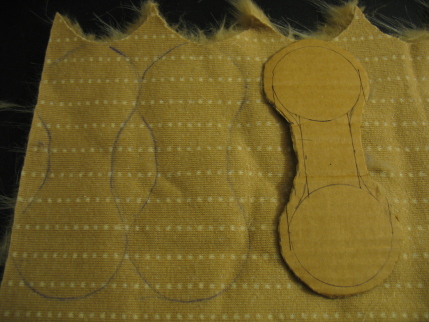
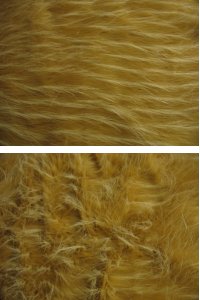
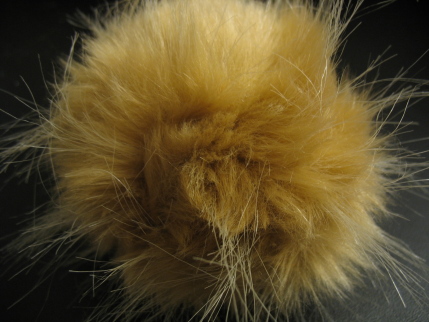
Trace your pattern onto the fabric, and remember you’ll need two pieces to make a tribble. Your faux fur is going to have a grain to it, so make sure that every piece you cut out is cut with the same grain. This means that when you sew the two pieces perpendicularly, the grains clash a bit and it gives the tribble its stylish hairdo. Top: Petting it with the grain. |
 |
|
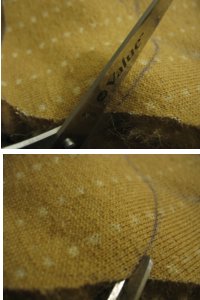
Cut along the line VERY CAREFULLY. You should snip using only the tip of your scissors at the base of the fabric. If you simply cut along the edge without snipping, you’ll take off the fur itself and leave the edges short and ragged with the center nice and long. Since the whole thing should be nice and long, cut very close to the base and try to avoid trimming the fur itself. |
|
|
Top: Do not do this! You’ll take too much fur off. |
|
Stage Three: Sewing it Together
|
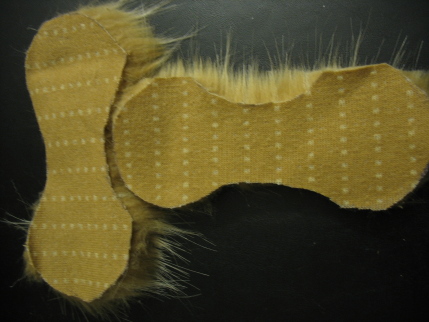
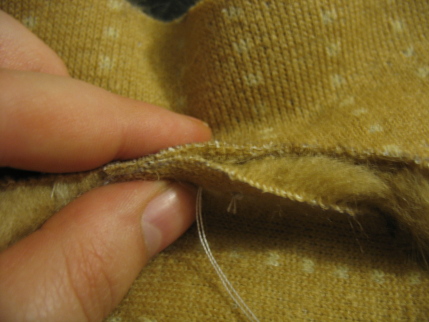
Lay your two pieces of fur down perpendicular to one another. Try to line up the centers. Now hold the two pieces of cloth so that the fur is sticking outward, and not inward towards the inside of the tribble. |
 |
|
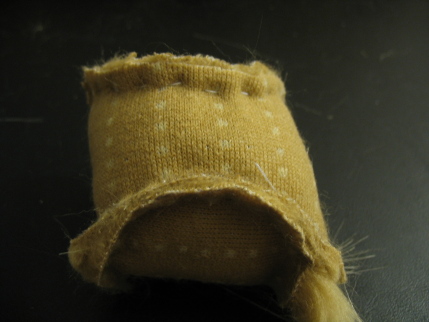
Start your knot and begin stitching about 1/4 inch from the edge of the cloth, and just work your way around. I did a simple running stitch. Work your way (slowly!) around the edge, leaving about an inch or so open so that you can turn your tribble inside out and stuff it. |
 |
|
When you get to that point, make a good strong knot—you don’t want the whole thing coming undone while you’re stuffing! |
|
Stage Four: Stuffing and Finishing your Tribble
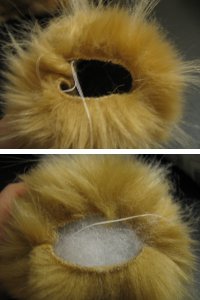 The fun part! Carefully turn your tribble inside-out (or right-side out, actually) by pushing it through the hole you left open. Once it is inside out, begin stuffing with the polyester fill. It should not take much, but stuff it as much as you like.
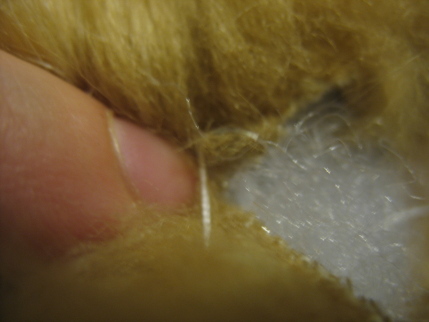
When you feel it’s been properly gorged with your quadrotriticale substitute, start a new thread and close the hole. This part is tough, but the good news is that the long fur is pretty much guaranteed to hide your stitch anyway. While you may have better luck than I did with the usual slip stitch method, I wound up just holding the two pieces together as best I could and sewing from underneath to try and hide the stitches. Your mileage may vary.
Stage Five: Hold it and Love it Forever
<3
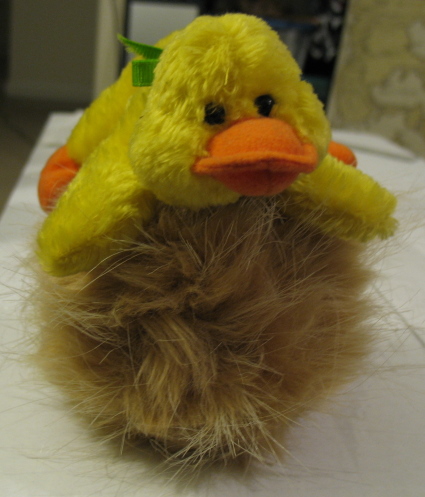
Torie Atkinson has so many tribbles yet to make for the winners of those contests… she wishes this version could breed.
The Star Trek Re-Watch will resume next week with “Patterns of Force.”




Proud owner of a TorieTribble. It calms me on overly busy days….Which is why I’m holding it right now.
Excellent directions, Torie! The engineer in me, however, wants me to point out that as you trace the pattern onto the fabric, if you move alternate patterns down a half-length and nest the circle into the “cove” of the one next to it, you will wind up with less waste.
Of course, this really only matters if you are making a lot of these, and what are the chances of that?
I am vaguely tempted to make hot pink ones.
@@@@@ 1 Irene
Purring sound not included. But I’m glad it soothes.
@@@@@ 2 JWezy
You know I actually did that initially thinking the same thing, but it didn’t quite work out–it’s not an M.C. Escher fit. The result was a wash, and this was a lot easier to keep track of and cut (and easier to show!). Maybe I’ll do the next section that way just to spice things up, though.
@@@@@ 3 viridian
That is so wrong! Yet I’m kind of curious…
Ooh, an arts and crafts project to inflict upon my child! Yay! (And she’s so girly, I’m sure we will end up with a hot pink one.)
oooooh…. ahhhhh….
The joys of Trek!
@3
Hot Pink Tribble would be a great name for a band.
My wife is anxiously waiting for her prize. She keeps trying to pet my tribble *which makes tribble noises* but I told her hands off now that she has won her own.
If you don’t want to (or can’t) buy fiberfill, wadded up nylon stockings* make good stuffing for small critters such as tribbles.
I make oval tribbles: two ovals with a triangular dart in each end for shape.
*the ones with runs in them that you were just going to throw away
@@@@@ 9 maryaileen
Great idea with the nylons!! I like that.
Oof, darts. I wanted to make it by cutting the least number of fabric pieces possible, but I applaud your efforts.
And if you don’t have the time or materials to hand, you can just get yourself a wild hairy haggis from Scotland!
Torie: I’ve never made a tribble, and it’s unlikely I will (though one never knows), but I’m curious: I distinctly recall that in David Gerrold’s The Trouble with Tribbles book, he shows the pattern for a tribble, and it was basically a figure 8 with wide, elliptical halves, joined along the long edges. The idea was that you would fold the thing in half at the connection and sew it almost all the way up, inside-out, leaving a gap to push the stuffing into, turn it outside-out through the hole, push in the stuffing, and sew it closed.
Did you ever try that and find that it didn’t work? Or is this your own design?
@@@@@ 12 NomadUK
Huh! I haven’t read that book so I never saw that pattern–an interesting approach. I’ll have to try that next. This one’s my own design (inasmuch as using a baseball pattern is my own design).
The only thing I tried that did NOT work was the hackysack pattern I linked to at the top. That many cuts and seams meant the whole thing was a) a nightmare to sew and b) horrible to look at.
these are adorable! I’ve got about a dozen all over my sewing room…..
the saddest thing is, I had to EXPLAIN what a tribble was yesterday
~SIGH~
Torie,
Where did you buy the fur fabric? I looked at some online fabric stores, and it seems that the pile on most of the fabrics they sell is too short! How long is the fur on yours, would you say?
@@@@@ 3 viridian
Like in the animated series episode?
@@@@@ 14 scissorrunner
But maybe that’ll pique interest in the show?
@@@@@ 15 piccadillous
The fabric I have is mostly 1″ fur with some 2″ parts sticking up (it’s kind of a mixture, but the 2″ bits are thin). I had to go to several fabric stores across two states to find anything, and wound up getting one color at small, suburban fabric shop (it was expensive), and the other one for super cheap at a Walmart. Good luck!!
Wow! The fluffy stuff is what? Animal hair it?
*looks around at assorted noise-making cat toys*
I bet there’s something here that could provide a purr… hmmmm…
Torie,
You wish that a tribble could breed? Are you mad?
@@@@@ 18 sunan
It’s faux fur–I bought it at a fabric store. No actual animal hair.
@@@@@ 19 Amalisa
Go for it! I thought about getting one of those recordable greeting cards, recording the tribble noise, and then putting that inside the tribble, but the mechanics of getting the recorder thing to go off wound up being too complicated.
@@@@@ 20 Freelancer
I have a lot of tribbles to make. You’d want them to breed, too. (Also yes, I’m mad.)
Torie, your baseball-method is cool. When I was 10 or 11 that episode inspired me to make a bunch of tribbles, the basic 2-oval kind (less sewing, but not as nicely pudgy). A funky, mom & pop craft store nearby sold bags of fur cloth for $5. Probably toy factory scraps. Back then, toys were still made in the USA. (Maybe some classic Trek fan is making tribbles in China…?)
If you can’t find it elsewhere, I’ve seen the long fur online in cool colors for making manga style wigs for ball-jointed dolls.
Hi there! I was just looking up a pattern for a tribble on Google and I found your post. I just made a tribble and I love it – thanks for the pattern idea! I even put a squeaker (like for a dog toy) in it so it makes noise. Heheh.
J’en aie déja fait 7!!! I ? tribbles !
I’m going to make a bunch of tribbles, and the next time we head to the airport to shoot some air to air video, I’m attaching them to the ouside of the plane. Trible attack!
– Andy
http://skypark.tv/
Thanks for this pattern. Just about to make about a hundred or so for a costume… *gulp*! If I remember I’ll come back here in february after its debued at the con and post photos!!
To commenter 29. Mad person! — Are you coming to Destination StarTrek in Frankfurt? I’m going! I already have my ticket for Friday. Now I’m going to make me a Tribble, thanks to Torie’s awesome tutorial!! I’ll watch out for the madperson covered in Tribbles then *lol*
I’m making a gift box for a friend and was trying to think of a creative packing material. Since it’s Star Trek themed I figured hey why not Tribbles! So glad you made this tutorial. Thanks so much!
I tried this with a 6″ diameter, but when I went to test, it ended up with corners! Is 6″ just too big? Are there any modifications I should make to my pattern? (I didn’t do a specific seam allowance, but I did line up the edges)
I want to try and make this as part of the centerpieces at my son’s bar mitzvah. For the person that made 100 tribbles, can you share how much fabric and materials you uses.