Steampunk interior design has been gaining quite a bit of attention over the past 2-3 years. However, many people still aren’t quite sure on what classifies a space as “steampunk.” There are few set precedents and even fewer examples to look for, which is discouraging for most when trying to incorporate the style into their space. I, however, look at it as an opportunity. Steampunk, by its definition, is a reimagination of the past something that has one foot in reality and one in fantasy. There’s no set precedent, because steampunk is interpreted differently.
Trying to do a search for “steampunk interior design” brings up all the varied and different interpretations people have set forth. My favorite space that fully grasps the moodiness and glamour of steampunk is The Edison in Los Angeles. Located in a turn of the century electric plant and incorporation of the existing machinery and details creates a unique and very steamy interior. If you haven’t had a chance to discover The Edison, I highly recommend checking them out online, or even better, in person: 108 W. 2nd Street #101, Los Angeles.
Interiors like The Edison are often conceived and executed without the designer having prior knowledge of steampunk as a decorative style. Only after the project is completed does is have the classification put upon it. Whenever I, as a designer, get asked about steampunk, people always say “Well, I don’t even know what that is.” Which, I find out, isn’t completely true. I always tell them that steampunk is becoming so popular that they are familiar with the style, even if they weren’t sure what it was called. Listing popular media, especially movies, really helps to ground this style for people that are unfamiliar with it. Movies like The Golden Compass, Stardust, Wild Wild West and even the new Sherlock Holmes movies all have steampunk themes in the set design, and they help to give a visual explanation to those unfamiliar with steampunk culture.
My interpretation of steampunk interiors is more of an industrial Neo-Victorian interior. While I can appreciate spaces with more of an emphasis on the technological development within the steampunk world, I tend to focus more of my attention to interior finishes, furnishings and textures that evoke a very modernized Victorian feel. With steampunk gaining popularity, many companies are offering some of this style in their furniture lines. Restoration Hardware, being my prime example, has many pieces that definitely fit the aesthetic. There are also many artisans that are available through a simple search on Etsy and online that have some extremely beautiful and creative pieces available for purchase. I, however, like to create things as much as I can. Not only does this allow for customization, but it’s easy and often times more budget friendly. There is a shelving unit that I’d like to share my process in building that serves as a good base for customization and as a roadmap to creating one that fits for your space. These shelving units are proving to be popular in many online blogs, but when I was getting ready to construct this with my roommate, we didn’t find anyone that offered a comprehensive step-by-step guide on how to put one of these together.
Before we started, I created a map of the unit, based on what we needed where it was going and how large it was going to be. This map proved extremely useful when we arrived at the hardware store to buy the components. Since this is constructed out of plumbing pipe there are very few tools needed, but we did need to pick up a couple things besides pipe.
The specifications for our unit:
- (3) 18″x1/2″ pipes
- (3) 24″x1/2″ pipes
- (6) 12″x1/2″ pipes
- (3) 8″x1/2″ pipes
- (15) 6″x1/2″ pipes
- (15) 90-degree corners
- (12) 3-way splitters
- (6) nipples
- (3) 12″x72″
- precut pine shelving
- flat black spraypaint
- wood pre-stain
- stain and polyurethane
We also bought a degreaser cleaner, a 3/4″ borehole bit and screws to affix the top nipples to the wall.
After all the pieces have been bought, it’s time to start work. This project took two of us a weekend to complete, but most of that was due to prep work and drying times of paint, stain, polyurethane. The actual construction happened quickly. We first had to clean and degrease the pipe.

Since we were going to be painting the pipe we bought iron pipe that has a coating of grease to protect it. Since the paint won’t affix to a greasy surface we used a degreaser and cleaned all the piping pieces. We used Greased Lighting, but, honestly, it would be just as easy to use dishsoap and water since we didn’t see a difference in how fast the degreaser cleaned up the pipe. But make sure that you clean them well, because those pipes are dirty!

After cleaning the pipe, we set it up to paint. We used flat black spray paint, which took three cans to complete the painting, but this would also look great with a brass or copper paint. The flat black creates a really sharp line and reminds me of cast iron which is a fantastic element to Neo-Victorian and steampunk design. In order to paint the pipe evenly I created a stand out of scrap lumber and screws placed vertically, to put the pipe over, I highly recommend this as it made painting the pipe go by fast and saved us from painting our hands.

When painting with spray paint, make sure you use slow even strokes, and slowly layer the paint on. I’m not a patient person, but doing this ensures that you end up with no-drips and preservation of the fantastic details of the cast elbows and nipples.

This is also crucial as it keeps the threading from gumming up with paint, which you’ll be thankful for when it comes to putting the unit together.

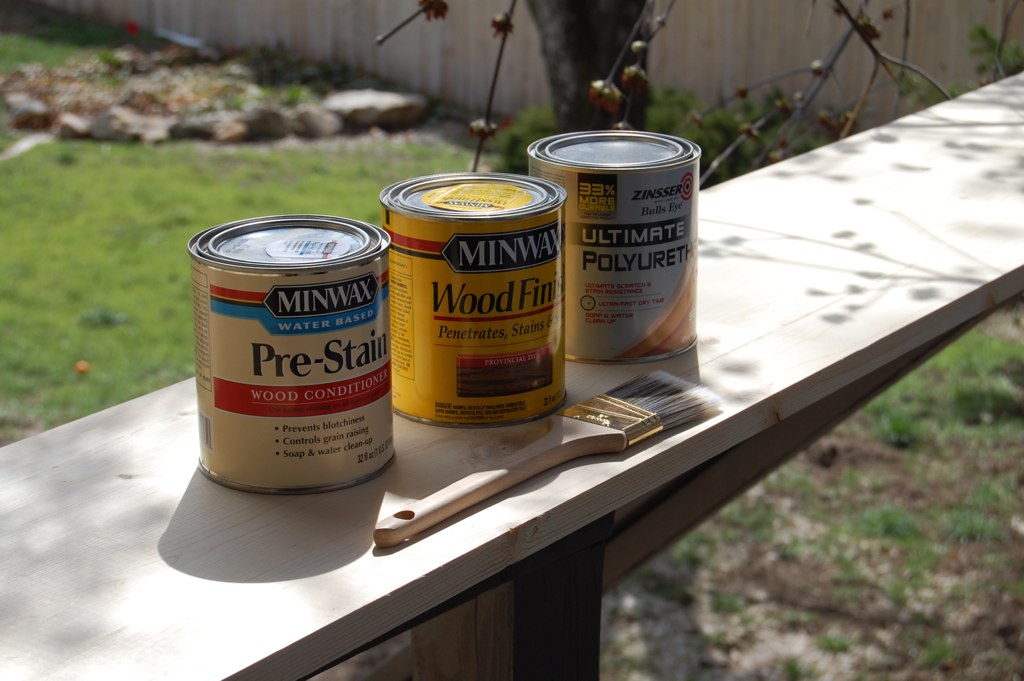
After the painting is done, it was time to focus our attention to the shelves. We used pre-cut pine boards intended for shelving. Originally, the plan was to use plywood since we’re able to get a nice detail on the front of the shelved with the stacked layers of wood, but these shelves were easy to pick up and take with us that day. However, when it comes to working with pine, my experience has taught me it’s not easy to stain dark like we wanted. So I did my research on how to get the wood to take the stain evenly. We ended up buying Minwax Pre-Stain and Minwax Stain in Provencial to use on the shelves.

The purpose of the pre-stain is to open up the grain and allow the wood to accept the stain evenly. Since I knew we were going to be staining these dark, and any variances would drive me nuts, I followed the directions exactly. The staining when fairly quick and we used 3 coats of stain with sanding in between to keep the boards smooth. This is very important, and if you’ve never stained before, there are plenty of online sources that explain how to stain and the steps involved definitely give them a look if you’re a first timer.
It’s also important to note, that before we started staining is when we drilled the holes for the pipes to go through. Based off of our map, I knew that there were three holes in each board that I set back ½” from the front of the shelf and ½” in on the sides.
We completed the shelves by putting two coats of polyurethane in a satin finish on the boards. I believe wood should never be glossy, and in keeping with the aesthetic, a satin finish gives the wood the protection it needs, without it looking new.
After the shelves were dry, approximately 24 hours after the coat, we decided to put the unit together. It’s much easier to put this together in the room it’s going in and then, just lean it up and attach to the wall. We went with my map to screw the pieces together and get all the supports in place.

After getting it pieced together, it’s simple to lean up and get affixed to the wall. The unit seems like it will be flimsy, but with gravity, it keeps everything in place. We had my dog running around in the room, and underneath the supports and that thing wouldn’t budge.

Here’s a picture underneath to show how we completed the shelf supports. We used the 6″ pipes with an elbow to support the shelf.

This shelving unit has gotten so many compliments, and as I said, serves as a great base to completely customize from where I started it. It’s an easy project, offers great storage and helps to bring an industrial aspect into the home.
Steampunk is open to interpretation, and is a style that can go as theatrical or as subdued as you want it. Something’s I would recommend if wanting to go with a steampunk interior, and you can’t afford a designer like me to help you:
- Study Victorian interiors. These are easy to find as the Victorians were highly photographed.
- Read steampunk literature. My favorite book is The Difference Engine by William Gibson and Bruce Sterling. Reading helps to immerse you into the steampunk mindset and gets your wheels turning on how to re-create the scenes in your own home.
- Watch movies and television that is visually stimulating. The movies I listed earlier and others available for search help to offer tantalizing views into the fantastical Victorian settings. They’ve never let me down when I need inspiration for fabrics, wallpapers or décor.
Steampunk is gaining popularity and will only continue to rise. It’s forgiving and comfortable, style wise, and allows your personality to shine through. It’s easy to incorporate into your existing interior or to have it all its own. So get out there and play around, because you’ll never know what you’ll come up with.
Tyson Ness is an interior designer who received his Bachelor’s degree in Interior Design in late 2010 from the Art Institute of Salt Lake City. His graduate project has been gaining attention and has won awards and praise within the design community. Ness’ style combines contemporary design with steampunk detailing. Over the past few years, steampunk attributes have begun to gain presence in mainstream media, and Ness’ innovative designs allow this outré style to be incorporated elegantly into interior spaces. Ness is uncommonly versatile with projects varying from residential to commercial, traditional to contemporary, minimalistic to intricately complex. Ness currently works in New York City and is a member of the American Society of Interior Designers and sits on the Student Advisory Council for ASID.
For more information on Modern Victorian design, please visit www.modvic.com or contact Bruce Rosenbaum at bruce@modvic.com.


